 LayerCut
The fit test
One small sheet, cut once per material, that tells you your true kerf and the best fit for slots and pins.
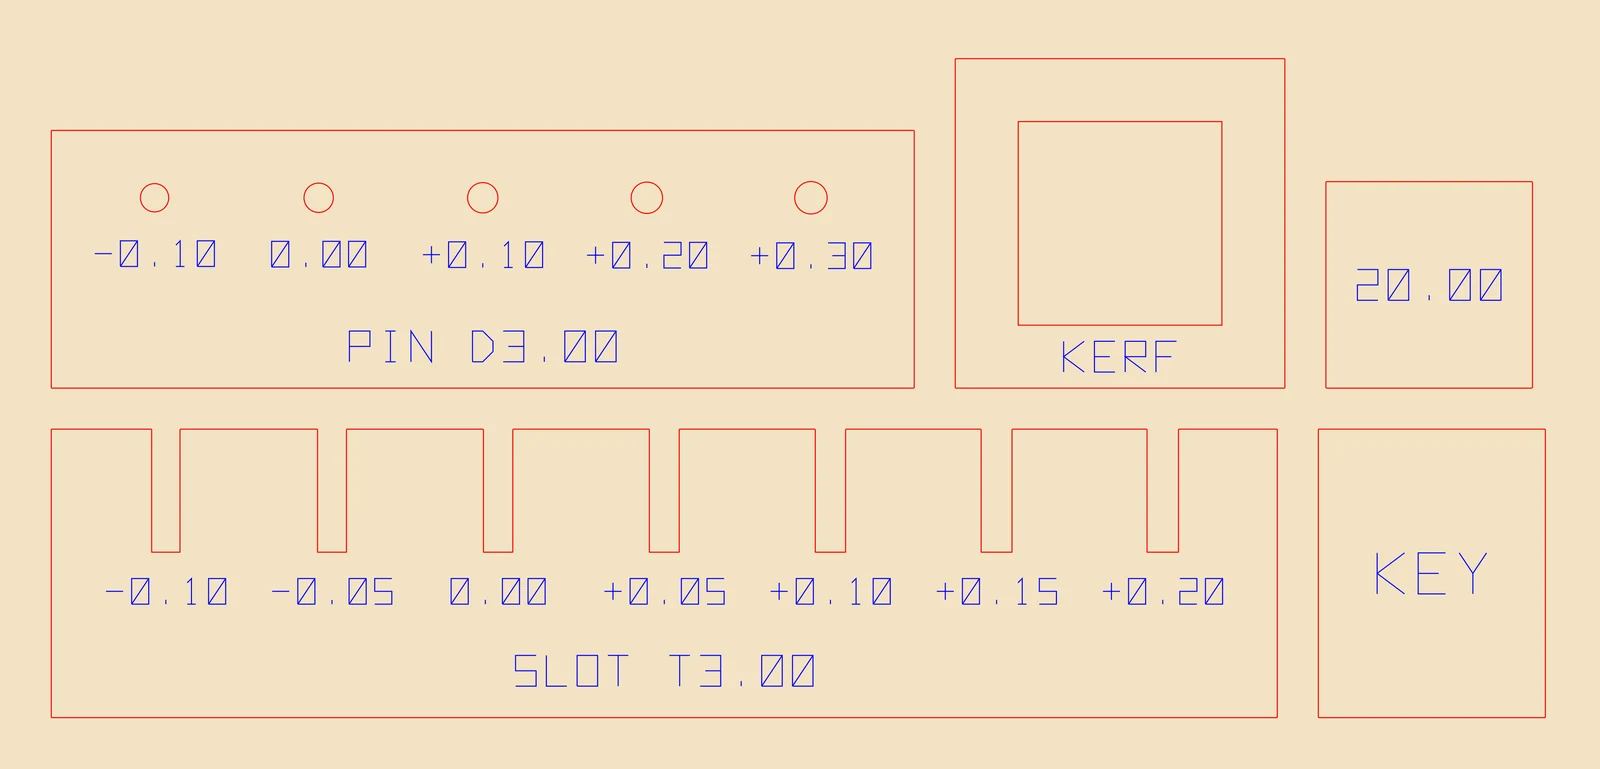
Cutting it
Choose Material → Cut a Fit Test…, or click Cut a fit test… in the Materials panel. LayerCut writes the test as LightBurn and SVG files, with a text file of instructions alongside.
Cut it with the same sheet, power and speed you'll use for the real job. Every piece is kerf-compensated exactly as a real model would be.
1. Kerf (do this first)
Measure the 20 mm square edge to edge with calipers, then work out your true kerf:
true kerf = current kerf + (20.00 − measured size)
For example, with a kerf of 0.14 mm, a square measuring 19.92 mm gives 0.14 + 0.08 = 0.22 mm. Enter that as Kerf in the material. The square should also drop into the frame marked KERF with a snug fit.
If you changed the kerf, cut the test again before step 2, because the slots and holes depend on it.
2. Slot clearance (interlocking and panels)
Push the KEY strip into each slot of the comb. The slots run from −0.10 to +0.20 mm, in 0.05 mm steps, and each is engraved with its value. Choose the one that fits the way you want:
- hand-tight, to hold without glue
- slightly looser, if you'll glue the piece
Enter that number as Slot clearance.
3. Pin hole clearance (stacked)
Try your dowel in each hole of the PIN plate: −0.10, 0.00, +0.10, +0.20 and +0.30 mm. Enter the best one as Hole clearance.
4. Save the material
Click Save in the Materials panel. Every export from now on uses these values.